Showing posts with label Sewing Room. Show all posts

9.16.2011

Repurposing


I try to be more aware of the things that get thrown away around here.
I like to repupose things, to see what else they can become.
Give them another life if you will.

I know I’ve shown my sewing room before. 
But since Donna’s themed link up for this week’s SNS is repurposing.
So, I thought I’d point out a few thing of the things I’ve done in here.


sewing table_edited-1
(look, more trim to paint. will it ever end?)

The table was put together with some new wood for the base 
but the top is one of the flat paneled doors that we are replacing in the house.
 All that was needed was to add a bit of trim.
I left the doorknob hole for the cord to go through.
You can see how it was put together here.


memo board_edited-1

The memo board was an old window frame. 
I just added some chicken wire for one side and some foam board covered in burlap for the other. 
You can see how I put it together here.
The ribbon holder was just an old shelf I had picked up at an estate sale.


jars2

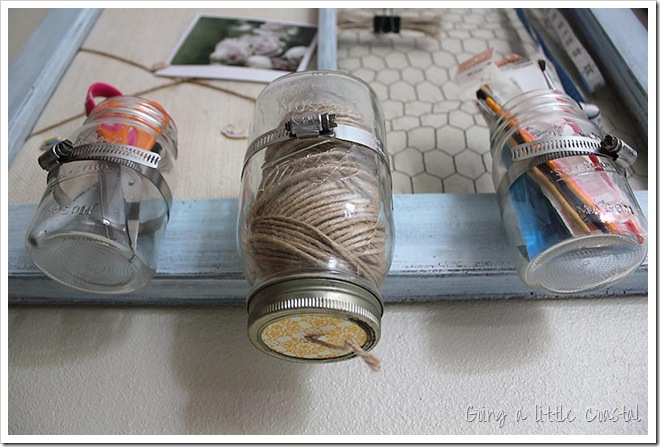
I added some old jars with some plumbing straps. 
They make great holders for brushes, scissors or a jute dispenser.


pincushion_edited-1

Jars are great for holding a lot of things. 
Here I just replaced the top insert with some fabric and stuffing and it’s now a handy pincushion.


quilts2_edited-1

I picked these quilt pieces up from ebay the other day.
I’ve been hanging out there looking for some vintage quilts.
I haven’t had any luck winning any big quilts but I did get these pieces.


quilts_edited-1

They are waiting for some repurposing of their own.
What have you repurposed lately?

Linking up with:
Funky Junk Interiors: SNS 99 Repurposing

image

5.29.2011

Window Frame Memo Board


I finally hung up the ribbon rack I made for the blogiversary celebration we had. You can see the before here.

memo-board

I have had this pinned on my Pinterest board for awhile. I’ve been wanting to do something similar.


So this old window frame has been lying around so I thought I’d do something with it. Here is what it started out like. Just brown.

window before


The middle piece needed to be glued again. I don’t think it was clamped the first time and the gorilla glue really should be clamped. I used some rope since I didn’t have clamps long enough.

frame glued

First I painted it with some blue paint I had then dry brushed some white on top. Sanded it a bit then added a little more blue back to it. I used a piece of foam core, wrapped it in batting and then with some burlap. I just taped it in the back with duct tape. Then I used jute to make the X’s on the front and tied them in the back.

window clamped     back

I popped into one side of the frame and used tiny nails to hold it in. The other side I stapled on some chicken wire. Then along the bottom I used some pipe clamps I found in the plumbing section. Screwed them into the bottom of the frame and then inserted some jars.

board

The middle of the X’s were tufted just by using some jute and a needle and bringing it through the foam core. Now I can use tacks or just tuck thing under the jute.

jars

I have room on either side to add some hooks or more jars.

shelf

I cut a piece of cardboard to fit the lid and glued on some of the paper I used on the desktop. Then just cut an X through it to run the jute through.

jars2 
Here it is all together with the desk. The desk was a pretty easy project to put together. If you are in need of a table or desk you can put this one together pretty cheaply.

desk

Hope everyone is having a nice relaxing weekend. The weather has been great. We’ll be going out on the boat if the water is good. I like a calm sea :)

Linking up with:
Coastal Charm: Nifty Thrifty Tuesday
Savvy Southern Style: WUW
Funky Junk Interiors: SNS 95 


see ya,

image

5.07.2011

Sewing Table

Some of you might have already seen this post. It was my guest blogger post over at Gail's blog My Repurposed Life. I thought I'd post it here for those that might have missed it.

I have been wanting to put together a sewing area in my guest room so I can just keep my machine out and be encouraged to do more projects. I really want an old vintage table but until I find it I thought I’d put something together on the cheap. I found some plans over at Ana-White.com for a sawhorse desk and thought it might be something I could do. I’ve used a power tool before. How hard could it be? All I needed was 4 2x2’s and 2 2x6’s.

desk 

Here’s what I started with. I haven’t mastered taking pictures while cutting wood. The wood was cut according to the plans from Ana. She has a nice little list and easy to follow plans. I had some old flat panel doors in the garage since we are replacing them in the house. I thought it would make a good top. I used wood filler to fill where the hinge was. Turns out I really didn’t need to. Oh well.

sawhorse-diptych

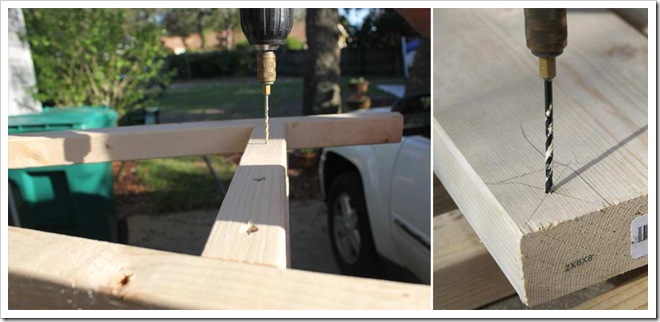
I made sure I predrilled all of the holes to keep from splitting the wood. I marked where the legs would be so I could get the screw in the center.
sawhorse-diptych2

In no time I had this! Not to shabby. Actually it was pretty shabby. Here is a tip: Sand it all down really well PRIOR to putting it all together. The 2x2’s are really kind of rough. So either upgrade to better wood or sand the crapola out of it. Sadly I learned this lesson after I already had primed and painted it. It bugged me so much that I filled some more, resanded and repainted.

sawhorse8

The door had to be cut down so it would fit on the only wall available at the moment. I added trim to hide the cut edge. I blobbed on some caulk on the cardboard inserts since I only had wood on the two ends to nail into. The rest was all nailed on. It has a nice rounded edge to it. I did need to fill a bit with caulk since the cut was not all that straight. Remember, caulk and wood filler are your friends.  :)

sawhorse6a   sawhorse5

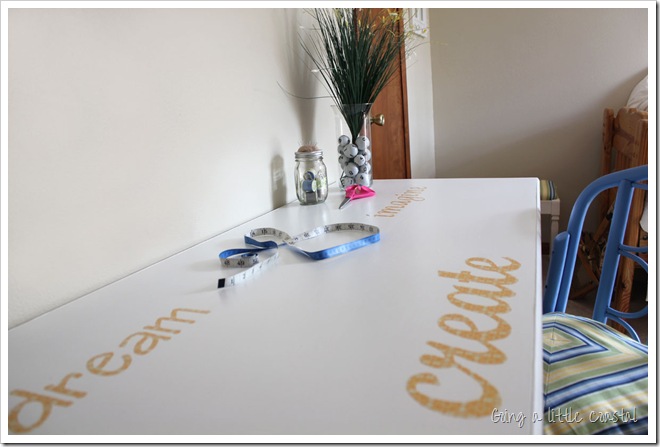
I hemmed and hawed about what to do with the top. I painted it all white and then I decided to add some words to the top using some really cute scrap book paper. I printed out the words on the computer and then just taped them to the cute paper and cut them out. No machine to do it for me. Just me and my scissors.

sawhorse9

I used some spray adhesive to glue the letters on and used an angle to get them on straight. The adhesive gave me time to move them a bit. Then I applied some water based polyurethane. Water base is best for applying on light colors. It won't yellow over time. Use several light coats. The first brush stroke went on rather heavy and my word started to ripple but I just smoothed it down it was okay.
desk3

desk2

I left the door knob hole there. I figured I could run the cord for my sewing machine through it. Then if company comes I can just place something pretty over it.

Diptych 2_edited-1

I still have work to do in this room. Painting and finding a daybed.  I need to find my extra long needle so I can tuft the center of that poufy cushion. I love that I have this extra space to work at and I don’t have to worry about the mess.

desk4

So there you have it. It’s a pretty easy project. There are a few angle cuts but nothing too confusing.

I hope you all will come visit and see this room when it’s all finished. Thanks again Gail for this opportunity. It’s been lots of fun!

see ya,

LinkWithin

Related Posts with Thumbnails