10.31.2011

Sweater Pumpkins


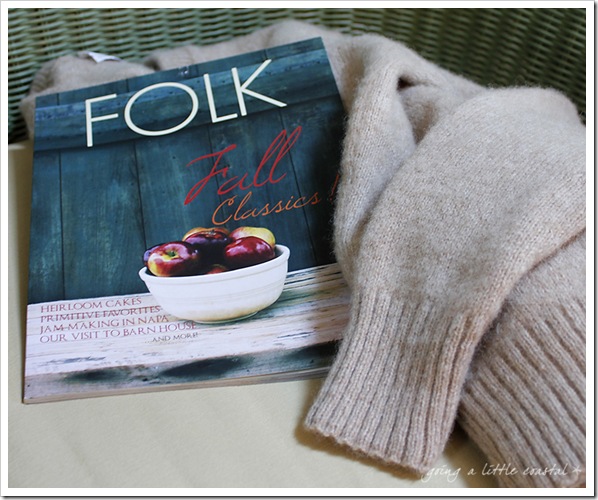
Have you heard of the new FOLK magazine?
This is their first issue.

I love the way they embrace living simply. Nothing fussy or fancy. It’s about enjoying the beauty that is around you and the little things in life that bring a smile to your face.

I fell in love with this issue so I subscribed.
I’m looking forward to when the next issue arrives in my mailbox.


cover copy

I had picked up this wool sweater at the thrift store and I wanted to try to felt it.
It didn’t really felt they way it should have because it was a blend and not 100% wool.

But it did soften up nicely and so I wanted to find way to use it.

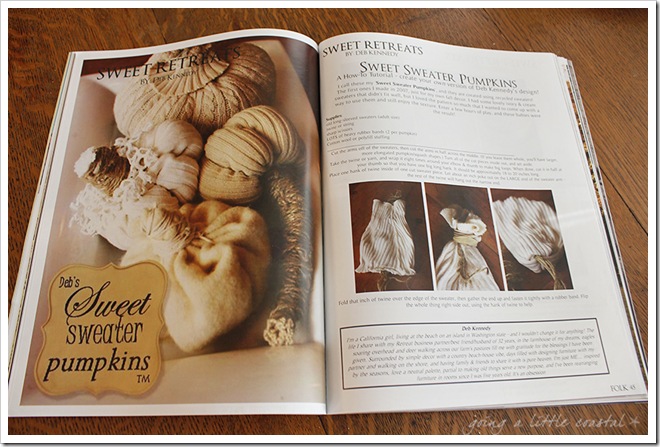
inside copy

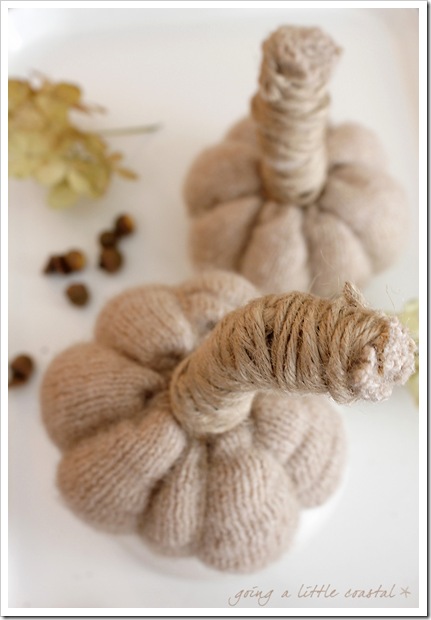
Inside of FOLK was this how-to from Deb Kennedy. She made these cute sweater pumpkins.

It looked easy enough so I thought I’d give it a go and see how they came out. 
There is no sewing involved so you non sewers can do this.

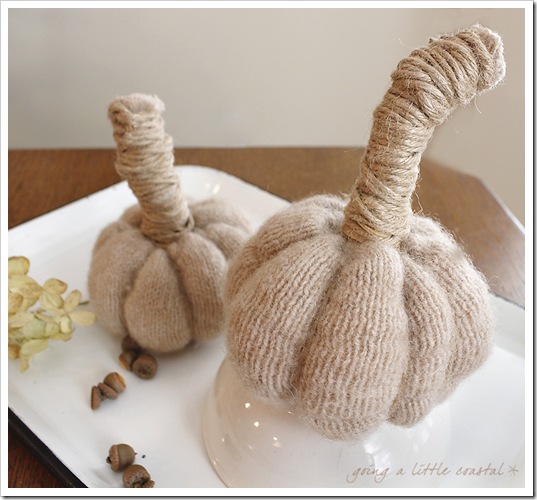
Here are my versions.


pumpkins 5 copy 
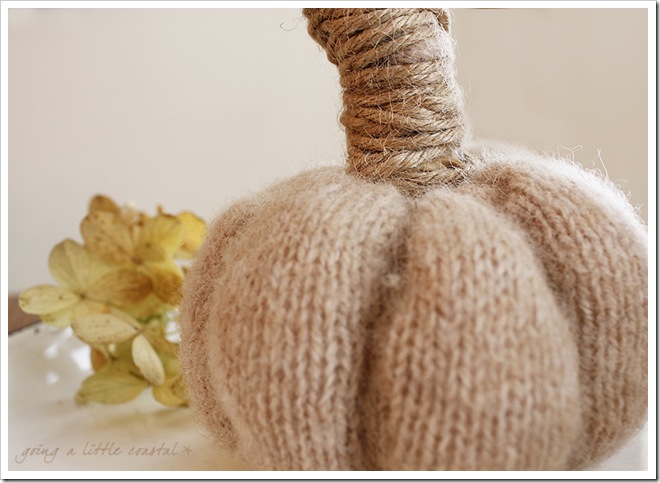
I like the way the stem curved a bit on this one.

pumpkins3 copy

pumpkins 2 copy 
I was able to make both of these out of just one sleeve.
Now I want to go find more wooly sweaters and make more!

pumpkins4 copy

I still have the body of the sweater left so I need to see what else I can come up with.
I’m thinking a cozy pillow might be nice.

Have you repurposed an old sweater into something else?
Leave me a link, I'd love to see it.

Linking up with:
Midwestern Sewing Girl: Everything Autumn
Freckled Laundry: Air Your Laundry
Inspired By Charm:Thrifty Thursdays


image

10.28.2011

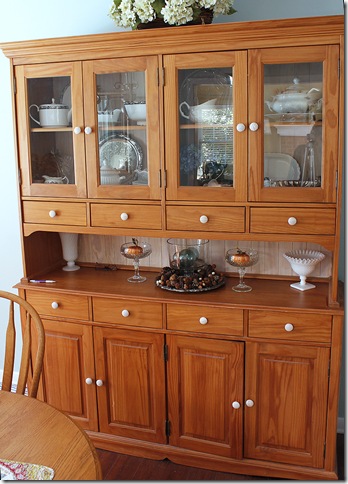
China Cabinet Reveal!


Are you ready to see the china cabinet? I’m sure you are all tired of me dragging this on and on.
I am so very thankful for everyone’s wonderful suggestions.

I thinned the paint just a bit like Emily suggested.
I kept the vacuum by my side when sanding like Debbie suggested.
I wish I had known about Kristy’s suggestion to use a wet scrubby sponge for sanding. 
Great idea to cut down on the dust.

Oh and just a warning, this is a long post so get comfy. :)

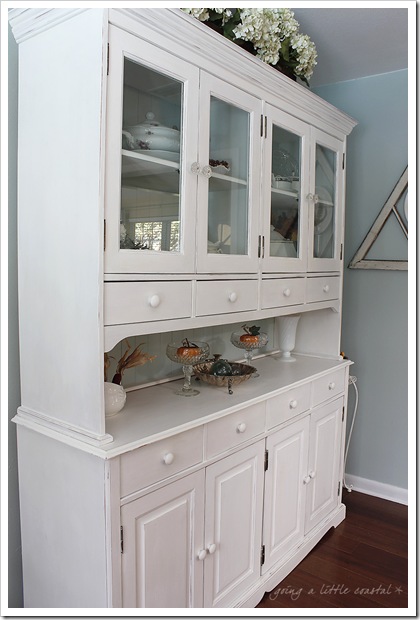
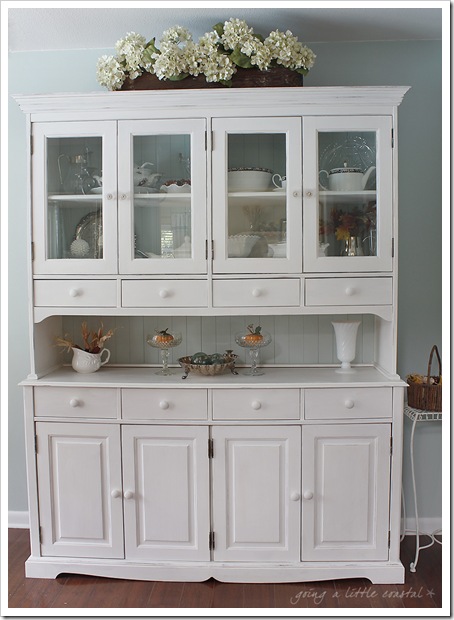
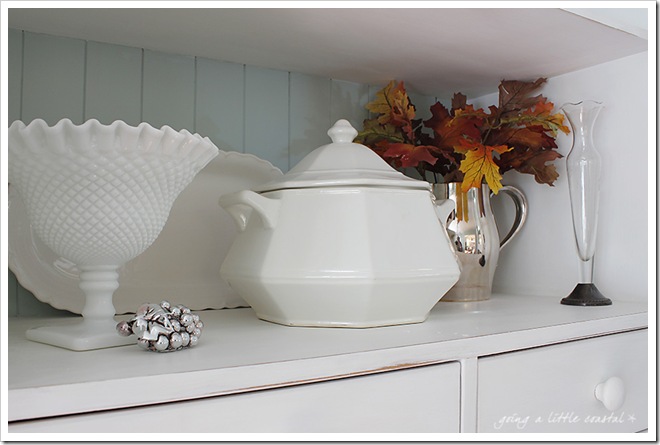
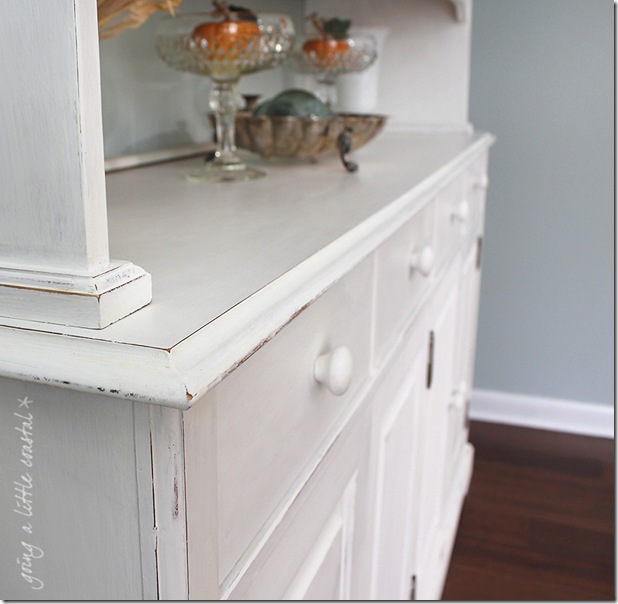
Here she is!


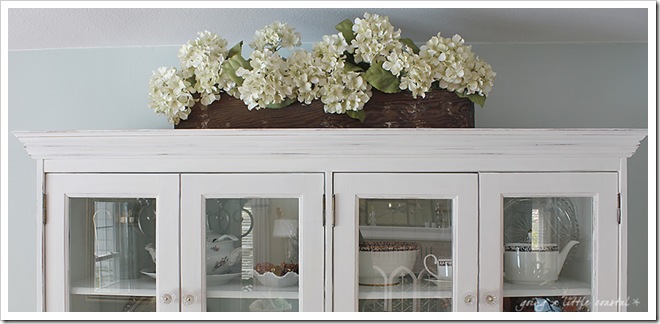
cabinet copy

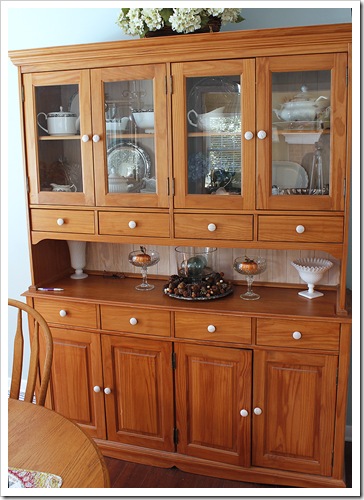
And for a refresher of what she used to look like.

hutch

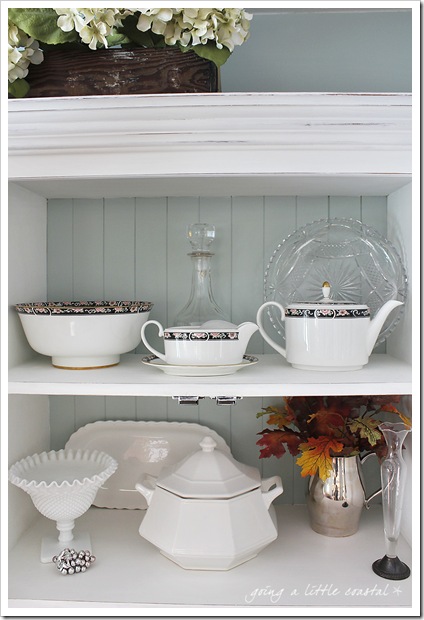
She’s quite a bit lighter and brighter now don’t you think?
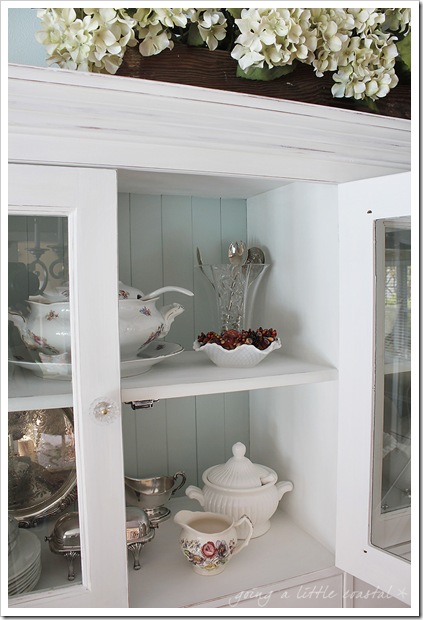
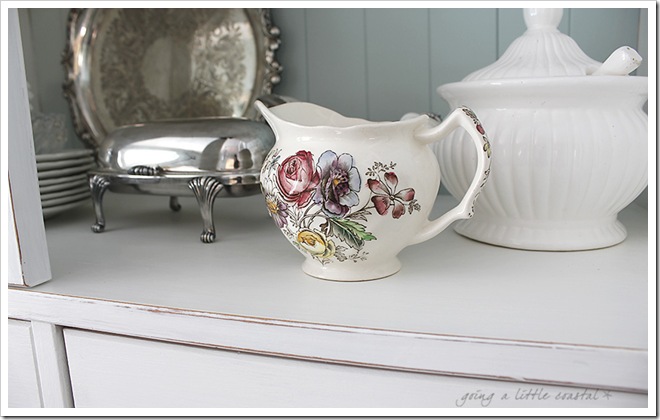
creamer copy
left side copy 
right side copy

I had a few panicky moments along the way.

I ran out of paint. I had some knob issues.
It took me a lot longer then I had thought. 
Mostly because that shelf doesn’t come out so I had to have my head in the cabinet and cut in all those edges.

corner copy

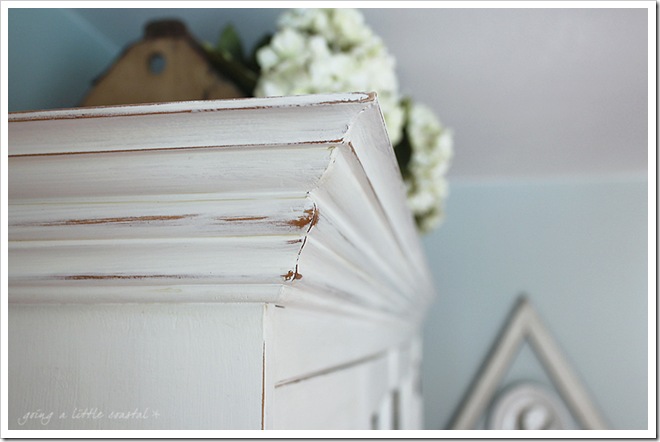
I showed you the other day how we beefed up the molding on the top of the cabinet. 
It’s really very easy to do and can make a huge difference on lots of cabinets or shelving.

top copy

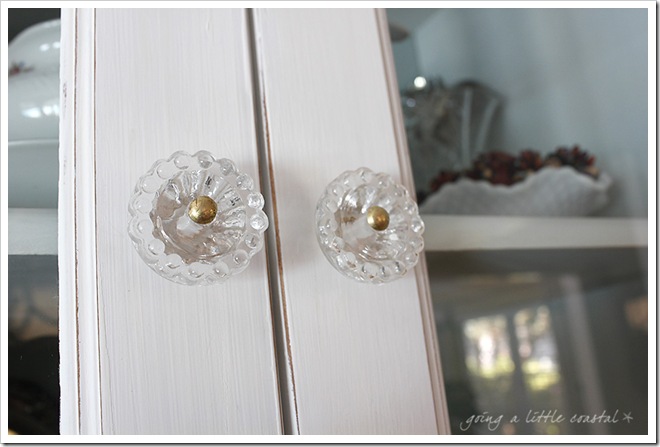
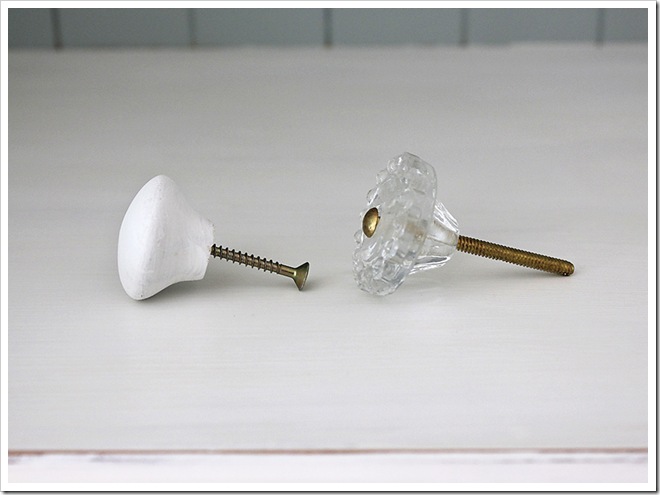
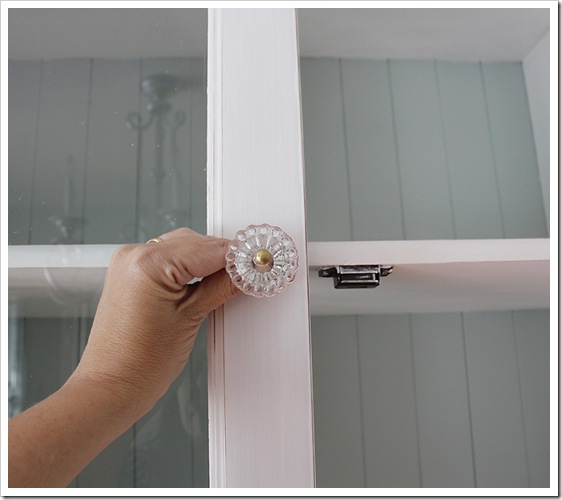
The knob problem was solved but cutting down the bolts and finding a thinner nut for the back. 
Then the little magnet assemble was moved forward just a bit.
Hubby discovered that late at night when we kept trying to get them to latch.

The idea to counter sink the nut was a great idea but I had forgotten that there was a metal plate behind the door and it was what was actually sticking to the magnet.
Not the screw head that I originally had said.

I still have not found anymore, there were only 6 in the box. So for now the rest stay wood.
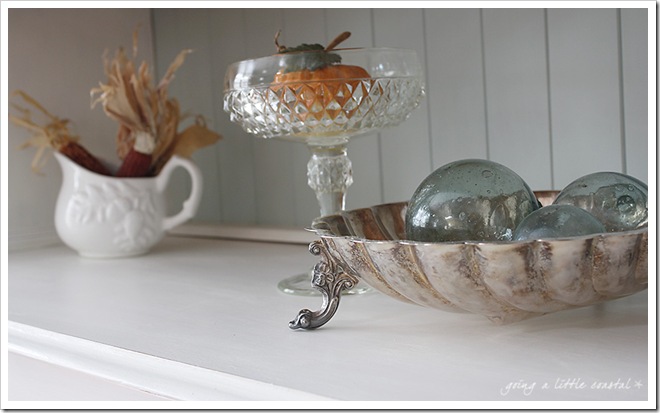
knobs copy
floats copy

cabinet3 copy

I know I worried a lot of you that I did not cover up my floors.
No need. It all cleaned up very easily. I just wipe as I go. 
Even if some spots dried, it just scraped right off.  
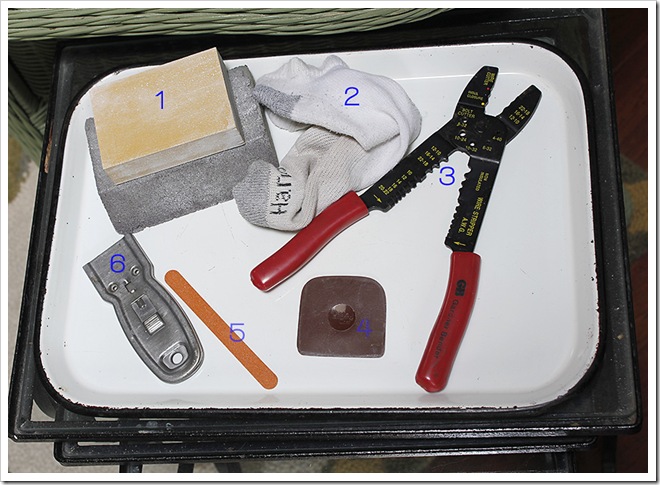
Let me show you some of the tools that made things easier for me.

supplies copy

1. Sanding Blocks: top is 320 grit for between coats and the bottom one is heavier grit for distressing the edges if needed. 
2. An old sock slipped over your hand make it easy to buff out the wax.
3. Bolt cutter. I knew we had some tool in the garage for this!
4. My Pampered Chef scraper got those dried bits of stray paint right off the floor. I swear!
5. An emery board is great for getting the chalk paint off the hinges. I left them on thinking I would paint them and then changed my mind. So this got off where I wasn’t so careful.
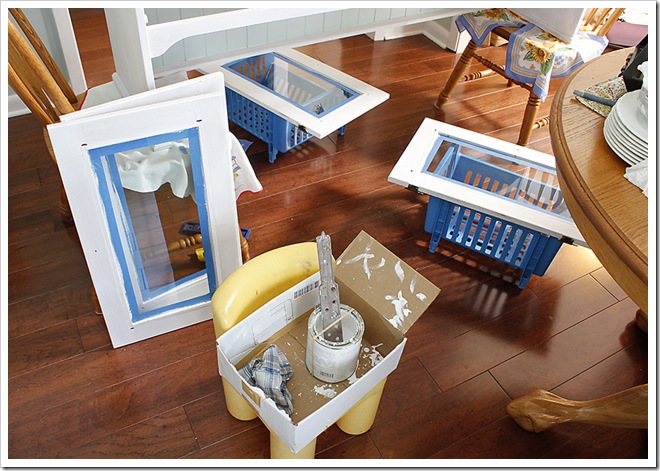
6. A razor blade. I taped off only one side of the glass doors. It was much much easier to just scrape the paint off the other side then it was to carefully place the tape, then score it to get it to come away from the door.


tureen copy

Are you still with me?
Just checking.

I just want to mention a few things about my experience using Annie Sloan’s chalk paint.
The first can I ordered through Robyn Story Design. They are super fast with their orders. 
The second can I found locally.

I had a hard time deciding on getting the paint because of the higher cost. I had rationalized this in my head with not having to prime, dries fast and easy to sand back. Not priming being my biggest draw.

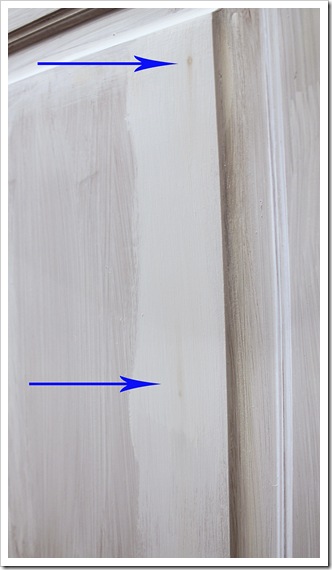
But using Pure White on top of a stained piece caused some coverage problems. I had some odd spots that bled through. You can see where I tried to cover them with multiple coats but it wasn’t until I spot primed it that they went away. I also had to use 3 coats in most places to get good coverage. Now, if you’re laying one color on top of another this won’t be needed. So keep that in mind if you are using any of the whites.

I loved the way it sanded. Smooth as a babies bottom. Smooth but yet you can still see my brush strokes. Odd? A bit. The brush strokes bothered me at first but then I got used to it.

bleeding copy
buffet copy

Would I use it again?

Yes!

I might stick with pieces that aren’t so hard to paint. 
I would have to consider the cost factor. I used almost 2 cans of it on this one piece. 
Yes, I could have primed it then did another coat but for me that defeated the purpose of buying it in the first place.

I’m anxious to see how a color goes on. I haven’t used my French Linen sample yet.

cabinet2 copy

Thanks  much for sticking with me to the end.
I know I bombarded you with a ton of pictures.

Hope everyone has a great weekend!

Linking up to:
Miss Mustard Seed: Furniture Feature Friday
Funky Junk Interiors: SNS 105
Savvy Southern Style: WUW
Primitive and Proper: Piece of  Work Wednesday
French Country Cottage: Feathered Nest Friday


image

10.27.2011

Guest Posting at Meridian Road.

I’m over at Suzanne’s place today.
Suzanne has the best sense of humor. We would get along so well. 
I hope that one day we can get together for shop shopping and some laughs.

So come by Meridian Road and see what I’m up to.

I have a little how-to on some glowing decorations for Halloween or any holiday.


halloween candles2 copy

Then be sure to come back later, I’ll be showing off my finished china hutch soon.

I want to thank everyone for all of your help with my little knob problem.
I got it worked out. You guys are the best!


image

10.26.2011

Knobby Issues, Help Please

I’m still here. Painting and waxing.
I’ve come across a bit of a problem. I have this stash of knobs. It’s a little weakness of mine.
But they all have these sort of posts on the back that require a nut.


knobs2

Not so much an issue with drawers but with the cabinet the screw head on the old wooden knobs hit the magnet and kept the door closed. With the new knobs I would need to cut down the screw (or is it a bolt?) and then the nut would make it stick out a bit from the door.

Do you think this would still work? Also, any idea how to cut the darn things? 
I may have to wait until hubby gets home since I’m sure there is a tool in that garage that does this.

Are there any pretty knobs out there that have the regular screws? I know there are the traditional kitchen cabinet ones but I am wanting something a little sparkly. 
The ones I see all seem to have the nut on the end.

knob

These aren’t bad though if I can get them to work.
What do you think? 


image

10.22.2011

Thicker Molding, a Sneak Peak and Angels Singing


This is taking a wee bit longer then I had thought.
It’s because those shelves don’t come out so there it lots of cutting in.

But I am hanging in there even with a couple of glitches.
First, I had to wait for #3 son to come home to help me move the top off of the bottom.
After all the dust and dog hair was cleaned I got started.

hutch copy

When we got it down I remembered that we had beefed up the molding many years ago.
It had such whimpy molding for such a large piece.

So I thought I’d show you how we did it.

molding2 copy

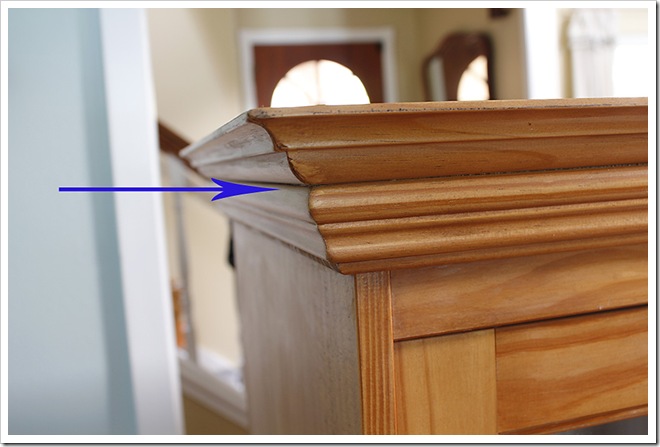
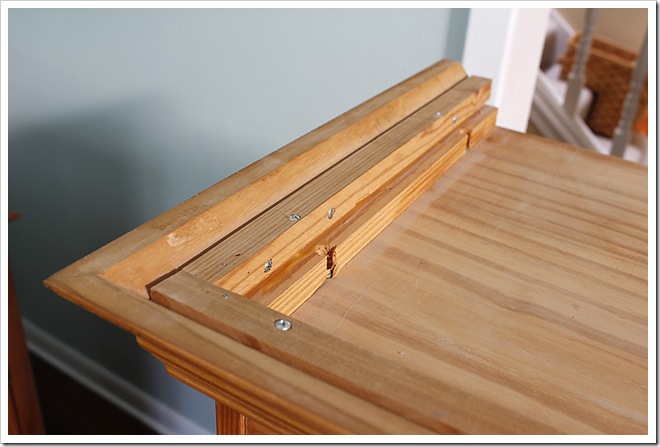
Here is where the original molding ended. It just was too thin for my liking.

molding copy

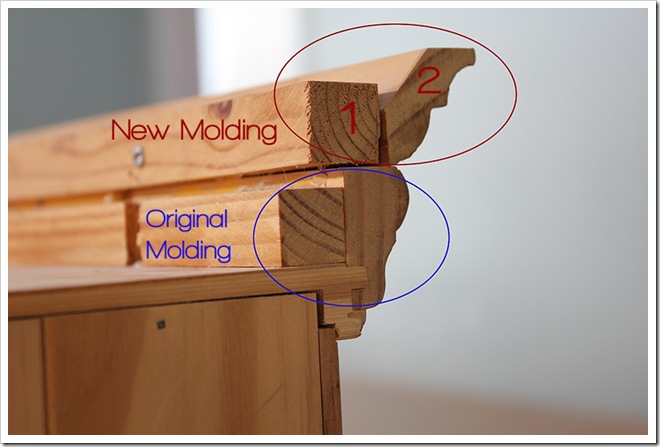
Here is a shot of it from the back. 
We just added a piece of square molding on top of the old molding. 
That gave us something to add the small piece of crown to.

molding3 copy

Here is another view. I have no idea why we used screws. 
I can barely remember what I did 2 days ago. 
It seems we use both screws and nails. We bought it unfinished about 12 years ago and I stained it.

So, I’m sure you’re wondering how the chalk paint is going,
 I’m having a love/frustrated relationship with it.

I’ll give you a little peak.

hutch2 copy

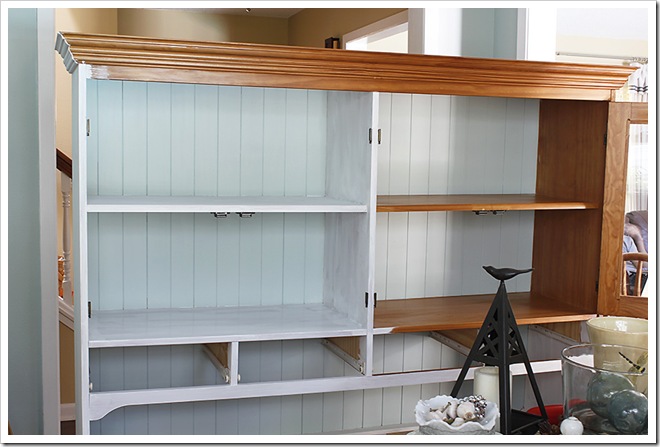
The back is all the same color. Trust me. It all looks like the the left side.

This is it with one coat of Pure White. I was prepared for applying 2 coats. But really, I need 3. 
That is where the frustration kicks in. I am getting near the end of my can. It’s late Saturday afternoon. Robyn Story Design, which is where I ordered it, is closed. 
They don’t open again until Tuesday. I wanted to get it ordered fast so it could get here fast.

Frustration turns to panic. I start looking for another stockist that might still be open. (stupid time zones) Then I see one in Tallahassee. But wait, what is this? One even closer? Like 30 minutes away? My heart jumped. Then, when someone actually answered the phone I think I might have heard the angels singing.

Hallelujah!

It was Elaine. My angel of mercy. Or my angel of Annie Sloan paint.

Elaine explained to me that her shop, The Sonshine Studio, isn’t opening until Nov 1. But that she had the paint and she would sell it to me! How sweet is that? I hurried my little butt over there and got my hands on another can of Pure White. Thanks so much Elaine!

doors copy

When Elaine gets her website up I will pass that along.
I’m just excited that I now have someone local. So keep checking the stockist list
They seem to be adding more and more all the time. No more shipping fees. 
Yippee Skippy!


(Here’s a little treat for you. You must hear KD Land sing this song. I know, I’m a bit all over the map today. Sorry about that. I would blame it on the paint fumes but there really aren’t any with this paint!)


I’ll be back with more pictures soon.
I am loving how it’s turning out!


image

10.19.2011

I Took the Plunge


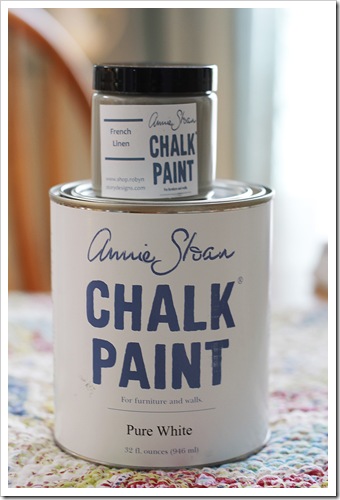
Yep, I finally did it. I ordered some of this.


chalk paint

I hemmed and hawed about it for so long.
I was waiting for Annie Sloan to come out with the pure white.

I also picked up a sample of another new shade, French linen.
I haven’t a clue where I will be using the French linen yet.

But I will be introducing the pure white to this big boy.

hutch

I thought it would be a good piece to try it out on.
Start big right? Crap, what have I gotten myself into?

The back is bead board and I will be painting that the color of the walls.

I still am not sure what I’m doing with all of those knobs.
Because there are so many I was thinking I should be a bit more subtle, but not boring.
Then maybe get some pretty ones for the glass doors. A little more bold

If you have any ideas for the knobs or if you have any tips on using the chalk paint I would love to hear them. I didn’t buy their wax. I have some Johnson’s wax and some Briwax. 
Has anyone used either of those with the chalk paint?

Okay, wish me luck.


image

10.18.2011

Camp Helen State Park


We took a drive a couple of weekends ago to Panama City.
 Hubby found a new anchor for his boat on craigslist. There was a mishap with is old one.
It seems there was a problem with a bolt that attaches it to the anchor line.
Yeah, it wasn’t there. So, anchors aweigh became anchors away.
Far far away.

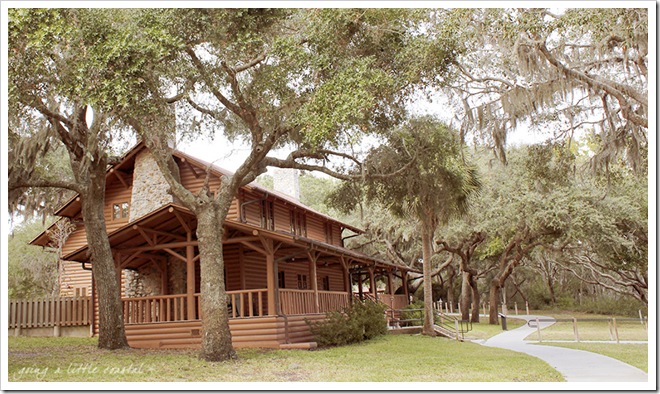
main house w Florida

On the way home we decided to stop at Camp Helen State Park for a quick look around.
This is the main lodge that looks out to Lake Powell. In 1928 Robert E. Hicks purchased 185 acres of land overlooking Philips Inlet, where he built a summer home for his wife, Margaret,
who named the compound Loch Lomond.

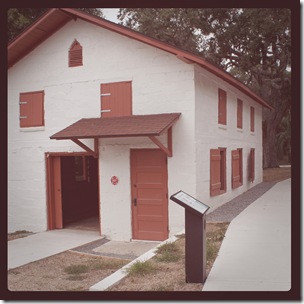
stable copy  kitchen framed copy
The stable is on the left and on the right is the old kitchen.


kitchen copy

In 1945 Avondale Textile Mills of Sylacauga, Alabama purchased Loch Lomond from the Hicks family, renamed the property Camp Helen, and for 39 years operated a resort destination for their vacationing employees.

bridge 2 textured2
  Kim Klassen textures used above.
Subtly Yours and Warm Sun.


path copy

It’s a large park and we didn’t have time to walk all of the trails.

butterfly copy  butterfly textured3 copy
KK Subtly Yours (twice, multiply and soft light) and Warm Sun again.


butterfly2 copy  
I could have spent an hour just taking photos of all the butterflies.

bridge copy

We’ll have to make another trip so we can explore a bit more.
And bring some fishing poles.

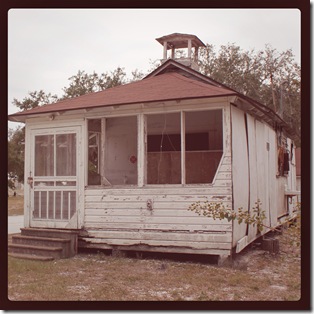
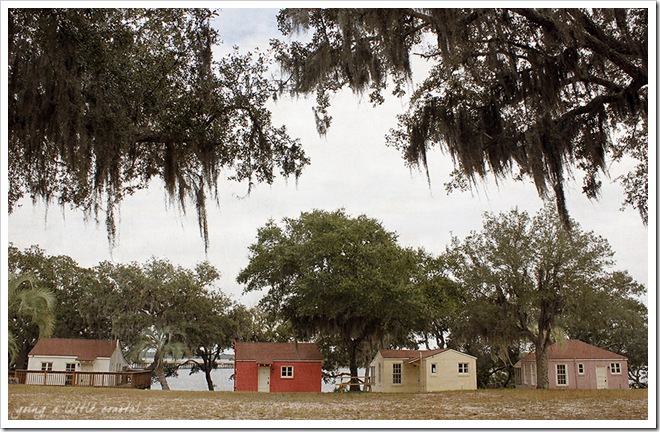
cottages2 copy
KK Stained Linen and Subtly Yours.

These are the original cottages that the employees used when they vacationed here.
Aren’t they cute?
I couldn’t imagine staying in them during the summer with no air conditioning even though they say the location helps with the breeze.

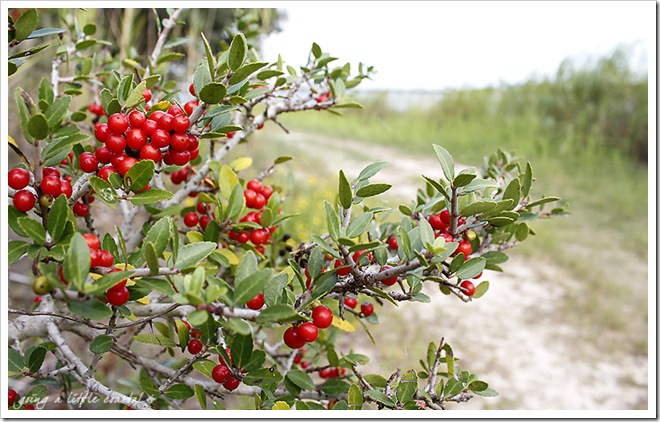
berries copy

It was so overcast that day. The skies look rather dull.

palm tree copy

That is until it was time to go. Then the blue sky showed up! 
Do you have state parks near you that you love to go to?

Linking up with:
Kim Klassen: Texture Tuesday


image

LinkWithin

Related Posts with Thumbnails