7.21.2010

The Highlight of my Day (or two)

I am so flattered and excited. I have been highlighted by two separate blogs. The Inspired Room and Craft Gossip. It just made my day!


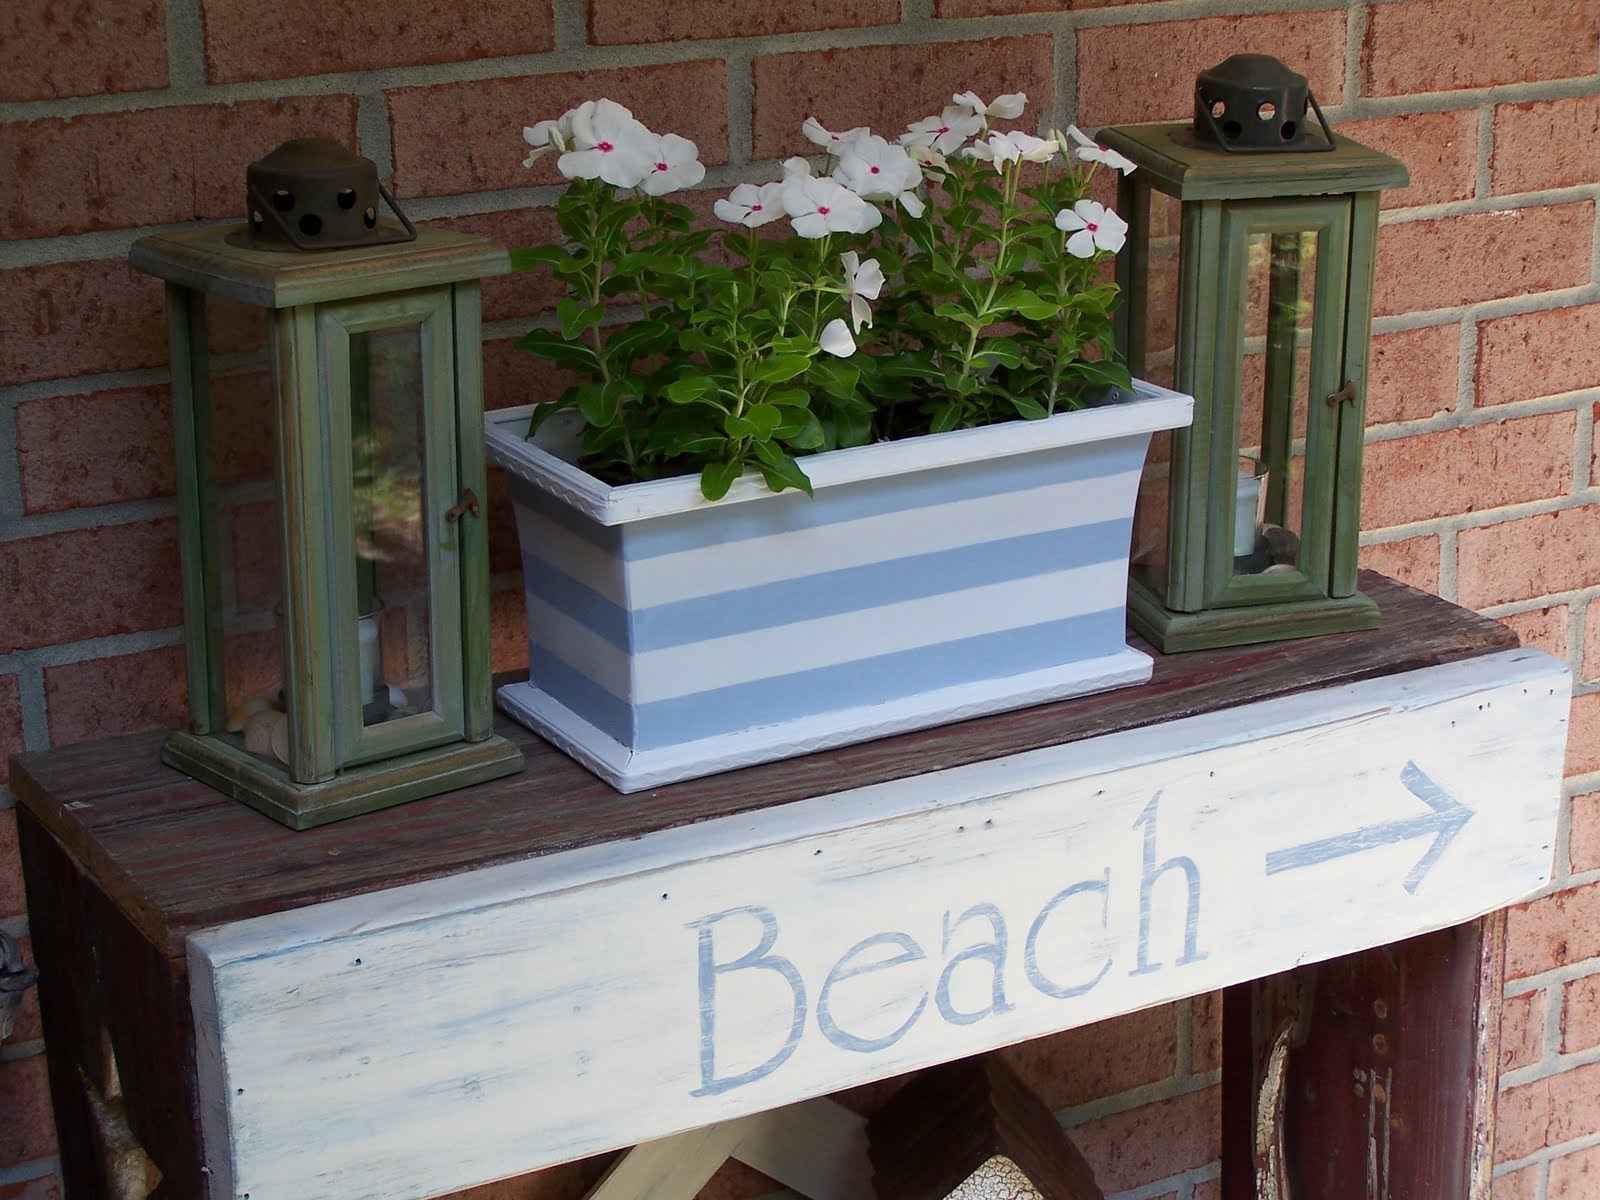
Melissa from The Inspired Room emailed me to let me know how much she liked my striped planter and that she put it on her tumblr page. I'll fess up, I had to google what tumblr was. I was not familiar with it. But then I found her link and saw all the wonderful people she has included and I was so honored to be among them. Melissa has such a wonderful blog. She was one of the first blogs I subscribed to back when I didn't have a blog of my own. I didn't even know what following was at the time. Her blog is chock full of beautiful inspirational photos and ideas. She also talks about "authentic living". I like this description, "It is finding satisfaction, contentment and fulfillment in the present." That is what we should all strive for don't you think? Thank you again Melissa!

Then I get an email from Amanda over at Craft Gossip letting me know she linked up my front porch. Craft Gossip is full of many different craft ideas from sewing to scrapbooking to recycled crafts.  And, and... it has a new category called Home and Garden. Amanda is heading that up and it looks like it's going to be a great source to find all the wonderful Home and Garden projects going on out there. You should hop on over and see what's going on over there and help her spread the word about this great new channel. I think it will be great. I can't possibly keep up with each and every blog that I see with great ideas, as much as I would like to. So, this will be a great compilation of ideas all put together in one blog. Fantastic! Thanks again Amanda!


My .50 cent Pillows

Stitched up a couple of pillows today. Well, sort of. Halfway stitched.

I was at TJ Maxx the other day and came across these two place mats. I liked the large stitched flower on them.


They were only .50 each. So, I thought I could turn them into pillows since there were only two of them left.

I just ripped out the seam on one side. It was topped stitched all the way around. Then I realized I should have washed them first because they were a bit stiff. There was some interfacing in them. I wish I had washed them prior to removing the seam on one of them as it would have not frayed at all. But it wasn't bad. I pressed them after they dried.


I had an old pillow that I was not using. It had gotten lumpy. So I ripped it open and refluffed it. Just pull it apart and it will refluff. I fluffed and I stuffed.


Then I pinned it closed. I have no pics of me sewing it because I was having a fit trying to get that fat thing under the needle and keeping it there. It then occurred to me that perhaps I stuffed it to much. So, I removed some, Stitched it almost all the way and then replaced just some of it so it wasn't so gosh darn fat. It would have been a lot easier to hand stitch it close but it was topped stitched elsewhere.


And there you go. Two pillows for .50 each. Not too shabby. They will eventually go outside on the lounge chairs I'm still looking for.


Linking up with:


7.20.2010

Brick Clips and a Little Redo

I had someone ask about the brick clips I used on my heavy scrolly thing. I thought maybe others might be wondering also. Or not. But I'll show you all just in case. This is what I used. They come 2 in a pack.


They don't look like much. The mortar might  need to be scraped out a bit to allow the little wings to be lodged up against the upper brick.Then there are teeth that grip the lower brick. Not much to them. I had my doubts. But low and behold they do work.


I used both clips to hold it up. Each clip holds 30lbs but it was long and needed both. No drilling, no anchors and you can move them around. Love them. Oh, and I got them at Lowes over by the picture hanging stuff.


There you go. Sorry about the glare. My personal photoshopper is at band camp. "This one time, at band camp...."


Oh yes, my lovely birdie planter redo. The flowers aren't staying. They need more sun. I haven't gotten to the store. Just wanted to show off the stripes.

before:

after:


7.18.2010

Decorating The Front Porch

I gave you a little peak of this a week ago. Maybe two. Time is flying by, is it not?


This is what it was. I had put this together years ago with the help of my hubby. It was two shutter that I cut down to make this little shelf for my porch. Then My sister had given me the sign and I nailed it right on the front. It's been sitting in my garage since we moved. So I dragged it out to my very narrow porch. I don't have much room to work with and this was pretty darn skinny. But I was not digging the veggie sign anymore. So, I sanded it down a tad. Painted it with some creamy white paint. Wait, what? I took no pictures of my during? Yikes, sorry. If I had an extra set of hands that would be helpful. I start getting into it and then don't think about a camera. Sometimes my son will even remind me. He was sitting right there and said nothing. Blame him.


I also dragged this out of my garage but wanted to lighted it up. I tried some white and letting some of the black show through. Not bad but not light enough. Needed more of a coastal feel to it. So, I took out some blues and mixed up a color. Put more white on the frame and the blue on the metal. Painted, wiped off, painted, sanded some.


This was working better for me and where it was going. I was a little unsure at first, I will admit.


Now, what else can I dig out of the garage. Why these dirty and cracked old things. They needed a good cleaning, some glue and a little nail for the latch. I was going to paint them but it was going to be too difficult since the glass did not come out. So, I just distressed them even more. Then rubbed a little walnut stain on them.

Also, found this. Tired of the dark green so it got a paint job and a little embellishment. Are you still with me? Get another cup of coffee. There are more pictures.


Okay, okay.  Here it is all together on my very narrow front porch. I hung the iron scrolly thing with some brick clips. No drilling into the brick. It's very heavy and two clips are holding it up. I had this large piece of driftwood that a friend dragged out of the water for me. Love friends like that.

Changed the vegetable to Beach, which looks much better don't you think? I printed the letters out and rubbed the back with a pencil then traced it on to the wood. Sanded it down to look weathered and dry brushed some of the blue on to the white. Easy peasy.


My birdhouses got a little shelled up. The small one got a little pale green paint first.


I just love the cut out of the star and the moon. Sometimes I wish I had not cut them up since I am now looking for a tall shutter for my bedroom. But I will come across some again. No biggie.

Threw some shells in the bottom of the lantern too. One can never have enough shells. I have one more thing to add to it as soon as I get more plants. These are looking a little sad.


This little beauty. It got a makeover too. The birdies are no more. It has a little bit of some coastal flair now. I will show you another day as I may have lost some of you  already. Besides, I have no picture yet.


Update:  Here is my little redo of the box above and  then added to the shelf.


I will be linking with 
Southern Hospitality Today's Thrifty Treasures
Between Naps on the Porch Metamorphosis Monday
Coastal Charm Nifty Thrifty Tuesdays


LinkWithin

Related Posts with Thumbnails