Showing posts with label Bathroom. Show all posts

1.11.2011

Mini Bathroom Redo

Remember how I was just saying how I should pick up some flowers at the grocery store? Well, someone must be reading my blog because someone brought some home when he went to get coffee. They’re like a burst of sunshine during these cold and rainy days.

flowers copy

Taking indoor shots is not easy when there are so many shadows but I gave it a try. Love the green in the center of the daisies.

mum closeup copy

Okay, one more with a little texture thrown in.

daisy textured copy

Today was spent working on the upstairs bathroom. Son #3 has now sprouted to 6’2” tall and I don’t think he’s done. The vanity in his bathroom was only 29” high. He looked like Will Ferrell in Elf using that sink. It has bugged me since we moved in. For one thing, the previous owners redid that bathroom. Everything in that bathroom was new except that teeny tiny midget vanity. Why? Why would people do such a thing? You are spending all that money just go all the way.

Upstairs bath and flowers_0060

Here is the before. I wish I had gotten a shot of him in front of the sink so you could see just how much he had to bend over. It was a little comical.
My new Purdy 6 in 1 tool came in very handy. It has a nice comfy grip and we used it to get the granite top off since we are reusing it.

Upstairs bath and flowers_0061

Oh yeah, someone has a cast on his right hand. I had to get in there and let him borrow my hand. It’s the least I could do after someone got me those pretty flowers. With my two hands, #3’s two hands and hubby’s one good hand we got it installed.


I’ll show you more later. I have to clean and do some wall repair and replace the trim. I also have to decide on whether I’m painting the new cabinet. I know, it’s new, why am I painting it? I do like it but it’s hickory and I’m not sure how I feel about the grain with that granite top. I got a super good deal on it. Super good. Just going to sit on it for a bit and then decide. I’ll be back!

see ya,

image

11.22.2010

Where Has The Time Gone?

Boy it sure is zipping on by isn't it? I'll be off the grid for awhile while. I'll be cooking and preparing for the big feast over at my sister's house. I hope to share some pictures when I get back. I'm going to try to schedule a post for while I'm away. Fingers crossed that it works. I will be joining the Mortal Muses. They are having a thankful blog hop starting Nov. 25 and will be open all weekend. There is a button on my side bar if you'd like to join along. It's always nice to stop and give thanks. You know for like wine, pie, chocolate, the important stuff.

I would like to throw a little thanks out right now. I am in the Top 10 over at the DIY club. Yea me! They seemed to like my little round table revamp. I'm up against a lot of great projects but I have my fingers crossed. If you have a minute you could stop by and maybe share a little love. I'd appreciate that.

I'd also like to thank Beckie from Infarrantly Creative. My new bathroom that used to be a closet was her fav pick over at The CSI Project. You should go over there an see all the amazing bathroom redos. Lots of talent. It's amazing. Beckie herself is one talented and creative lady. And she happens to be having one sweet giveaway right now. It might be one of these.

Silhouette Electronic Cutting Tool
Okay, it is. Oh how I'd love to wrap that puppy up and stick it under the tree for myself. You can stop by Infarrantly Creative yourself and enter. Tell Beckie hi for me.

Before I go I want to show you that I got the framed coffee sack hung up. Almost had to make a run to the ER after hubby slid down the stairs. See how the steps curve at the top? That is such a pain. No pun intended. But all is well and it got up. I had thought about hanging it on the opposite wall. That would have required the really tall ladder and I wasn't going to push it. No time for the ER this week.


 Hope everyone has a safe and Happy Thanksgiving!

 See you later,

10.12.2010

Recessed Magazine Rack

Hi everyone. Just wanted to thank all of the new followers that have joined along. I really love hearing from all of you and I thank you for taking the time to leave your comments.


 Let us revisit this little problem shall we?  You can review my slight anger management problem here. So, what does one do when there is a hole in the wall?


One makes it bigger of course. Or one gets hubby to make it bigger. Look what was in there. A metal strap on both sides. I'm no construction guru but this seems excessive to me. This is just a pony wall. He had to work a bit to cut through the metal but he did it. It was opened up as wide as it could be between the 2 2x4's.


This is the bad boy that was used to cut through the metal strap. It's the Dremel Advantage. It's quite the handy tool to have. I must explore it more as it even has a router attachment. It was such a tight spot to work in I couldn't get a picture of it in action.


Then he put this little box together with leftover stuff we had from the half bath. Basically it is just 4 pieces of wood. In this case it's mdf and a piece of bead board for the back. Just measure out the hole that you just cut. Two 1/4 inch holes were drilled in the sides for the dowels which hold the magazines in place. I gave it all a coat of glossy white paint.


He slipped it into the hole in the wall and screwed it to the 2x4's on either side. Then counter sank them so I could just fill and paint. The trim I had to get. I matched up to the trim in the bathroom. The bottom piece of trim creates just a bit of a lip to hold the magazines in along with the dowels. These are simple miter cuts that can be cut with a miter saw or a simple miter box and a hand saw. Fill in any gaps with caulk. Then touch up with paint.


Now I must edit my magazine and catalog stash. It's a sickness. I need help. The ones I will keep will go elsewhere so I don't trip every time I go potty.  Do you have a magazine obsession like me? How do you keep it under control?


Linking up with:
DIY Showoff Project Parade

The DIY Show Off

DIY Club

9.23.2010

Bathroom Caddy

Thank you all for all the sweet comments on the new bathroom. They all made me smile. I am so happy that it is done. I wanted to show you my caddy for the back of the potty. I don't have storage in here so I needed  something for a few towels and tissues. The spare roll of tp I'm working on. Trying to find a small metal bucket or basket. I had a basket but it was sort tight which resulted in torn tp. Can't have that.


I have had this metal container for a long time. Long time. Which is why it's hunter green and brass. Just never got rid of it because I loved the size.


I gathered some supplies. I just had to buy the gloss white and the ribbon. The ribbon was about $3 for 9' so lots of that left. I had the primer, jute and well as you can see, the glue gun. The glue gun has to be over 20yrs old. I think I got my moneys worth out of it. Quick funny story, hubby and I kept smelling something burning last night. I was checking everything. It was the glue gun I had left on for about 2 hours. The thing is indestructible. Lucky I didn't burn down the house though.


I started with the primer, then 2 coats of the glossy white. I had planned on painting this ribbed part but it was not going well so after I erased my mess with another quick coat of white I went with the ribbon and jute. Just a dab of glue to hold the ends down, then wrap it around. The ribbon is just tied in the back. It was the front but hubby wasn't digging the bow. Whatever. I just turned it around.


There you have it. Under $10 and under 1 hour. Spray paint dries pretty darn fast. 
So I'm joining up with Melissa @ 320 Sycamore for her little party.
and

The DIY Show Off


9.22.2010

Finally....The Bathroom

Hey everyone. Remember this mess? It took awhile but the bathroom is done. For those who are just arriving you can read more about the progress and what a mess it was here and here. Then there was the board and batten vs bead board issue that you all helped me think through here and here. Feel free to revisit and reminisce won't you? Without further adieu may I present....


The new bathroom! Let me say it's hard to take shots in a 5x5 space. But I did, just for you all. We did steal some space from the garage so no, your eyes are not deceiving you. My closet was not that big.


Here is how we solved the change in tile issue. The tile in the laundry room was still available but the dye lot was off. So, we went with a different tile, slightly smaller in size and used the transition piece in the doorway.


I couldn't go too frilly in here as it will be mostly used by my hubby. Hence the fishing magazines. Just noticed I forgot to put the shells in the jar. Oye!


I was short one hook but I went and predrilled it. This bath is just off the pool so I wanted lots of hooks for all of the towels. My original thought was to use boat cleats. Holy cow, those things are expensive. Hooks will do.


Okay, I slipped in a little bit of flowers. But they're in a manly color.


This used to be hunter green and brass. I'll show that on another post. Just gave it a little bit of a redo.


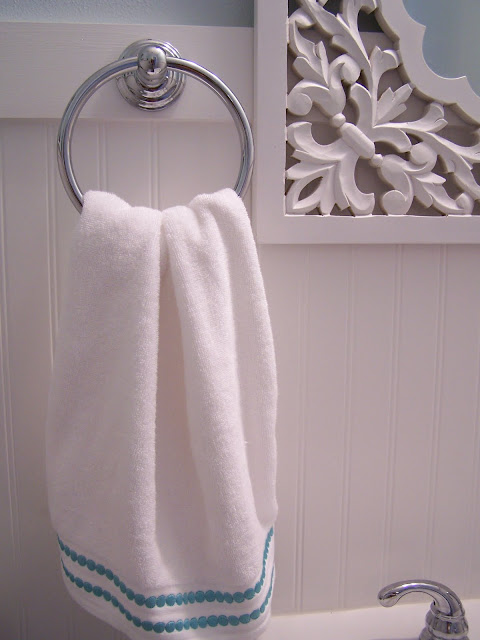
I have something else in mind for the towel ring. I'll show you if it works out.


I love the square sink and lights.The mirror is my little bit of pretty. But made out of wood so still manly right?


 Here is a wrap up of what I used. Everything else I already had.

Paint: BM Ocean Air (top) BM Chantilly Lace (bead board and trim)
Sink and Toilet: Archer by Kohler @ Home Depot
Faucet: Treveso by Price Pfister @ Tuesday Morning
Magazine Bucket: Tuesday Morning
Hooks, Light, Tile: Home Depot
Mirror: TjMaxx/Home Goods
Towel Ring/Towels: Marshalls


Linking up to:
Cottage Instincts Blue and Brown Bonanza
Funky Junk Interiors Saturday Nite Special
French Country Cottage Feathered Nest Friday
Between Naps on the Porch Metamorphosis Monday 
Thrifty Decor Chick Before and After 

Visit thecsiproject.com

The Lettered Cottage

9.14.2010

Trashcan Facelift

Trash cans. They should look good too. I am trying to gather things for the new bathroom and use stuff I have already. That was my goal so many months ago. To use more of what I have. I should try to remember that more often.


This is what I had. It was one piece when I bought it. But when we were packing to move here it for some reason fell apart. So, I just threw the rope in the can and threw it all in a box. It's been like that for over a year now.


So, I rewrapped it all and used some hot glue to keep it together. That was fun. Wrap, glue, hold, scream, wave hand, repeat. This is it all back together. It had been painted this mossy green. Not bad. But not good for the bathroom.


Out came some paint samples. I used some Palladium Blue from the dining room. You can see it in the background. I just dry brushed it on.  But still too much green showing through for me.


So, I did some more. Even though this picture looks exactly the same as the one above. Hmmm, trust me there is more on it.


You can see it better from this angle. Which is really the angle you will be seeing it at when you are at the sink and from well, you know, the potty.

Bead board is going in as I type. I hear saws and nail guns. I'm scared to look.


Linking up with:
Coastal Charms Nifty Thrifty Tuesdays
Debbiedoos Before and After Party
The DIY Showoff Project Parade
Domestically Speaking Power of Paint Party


LinkWithin

Related Posts with Thumbnails